Sequin walls are getting more and more popular these days, and they don’t seem to be going out of fashion anytime soon. Today I’ll walk you through what you’re going to need to create a spectacular DIY sequin backdrop, as well as how to put it all together!
What is a sequin wall?
A sequin wall- (or Shimmerwall!) is a backdrop made of sparkling sequins. They are really popular for all kind of visual merchandising or event displays, and have been used by some of the biggest brands to make their products stand out from the crowd. They are also great for small to medium sized events such as weddings, parties, baby showers and photo backdrops. They come in all sorts of colours, so you can definitely find a shade to suit your theme.
What will I need?
Firstly, you’re going to need some sequin panels. Shimmerwalls.com is going to be your best bet for this. We are the largest supplier of sequin wall panels in the world for a reason! Our products use the highest quality ABS plastic; we have over 400 colours and finishes in stock; and we have the cheapest prices!
Now, you’re going to need to pick which type of panel will suit your project the best:
Option 1:
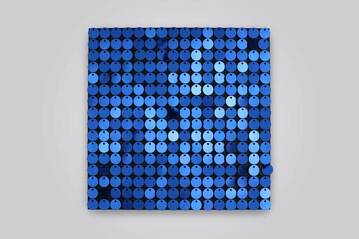
Our Standard Sequin Panels are great for one-colour sequin walls or very simple designs.
They measure just under 25cm x 25cm (9¾”), so four of them in a row would make a meter. These panels use 30mm (1⅜”) diameter sequins which are the most cost-effective option if you want a single colour, pattern, or simple design on your Shimmerwall. These panels can be mounted on a wall or backing board.
Option 2:
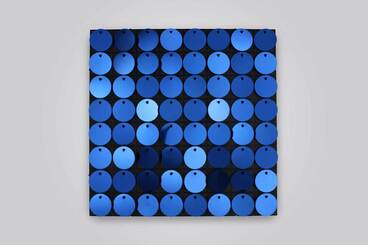
The Shimmerwalls Micro Sequin Panels are your best bet if you want to display a really intricate image on your sequin backdrop.
They are the same size as the Standard Sequin Panels (25cm x 25cm (9¾”)) however they are populated with much smaller 15mm (5/8”) micro sequins. This means your sequin wall graphic can be four times more detailed, so if you’ve got a photograph or logo, pick this! These panels can be mounted on a wall or backing board.
Option 3:
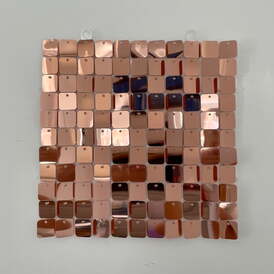
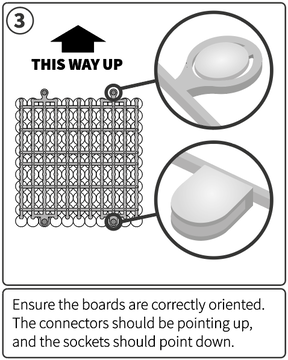
ShimmerClick panels are a new and innovative product launched by Shimmerwalls to provide a more accessible and easier to use sequin panel product for the small to medium sized events industry. ShimmerClick panels measure 33.3 x 33.3 cm (1’ 1⅛”) so 3 of them in a row would make a meter. These sequin panels use a grid shape, making it 60% lighter than anything else, and are populated with 121 standard size sequins.
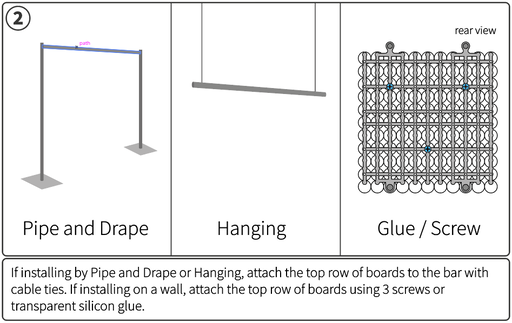
ShimmerClick panels can be mounted on a pipe and drape frame, hang from the ceiling, or can be screwed into a wall/ backing board. They are also the cheapest option!
Yes, that’s a lot to take in! If need any help choosing the best sequin wall type to suit your project, please give our friendly team a call, or send an email and we will do our best to help you.
If you chose Option 1 or 2, you will also need:
- A solid wall/ backing board on which to mount the sequin panels
- Screws or glue dots or silicon sealant
- An electric drill
If you chose Option 3, you will instead need:
- A pipe and drape frame
- Cable ties
- How to make a DIY sequin wall
If you chose Option 1 or 2, you will be using our Standard or Micro Sequin Panels, great choice! Now let’s start putting your sequin wall together!
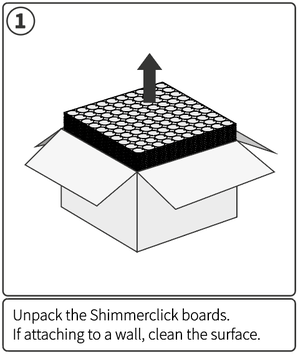
- Clean and dry your wall surface, this will make sure there is no dust or dirt behind your wall.
- Starting from the bottom, place the bottom row of sequin panels together against your wall.
- If you are using glue dots or silicon sealant, apply a generous amount to each corner of the first panel in a donut shape. Then carefully place the panel on the wall.
- If you are using screws and an electric drill, align the panel on the wall, and then drill a through the panel and into the wall. There are special indents hidden behind the sequins to make sure the screws are hidden!
- Move onto the next panel, repeating step 2 until you have completed the bottom row.
- Next, place the next row of panels above the bottom row. Make sure the panels are aligned straight and are touching.
- Repeated these previous steps until your wall is complete; step back and admire your Shimmering sequin wall!
If you chose Option 3, you’ll be using our new ShimmerClick panels. These will look amazing on a pipe and drape stand, so let’s get started.
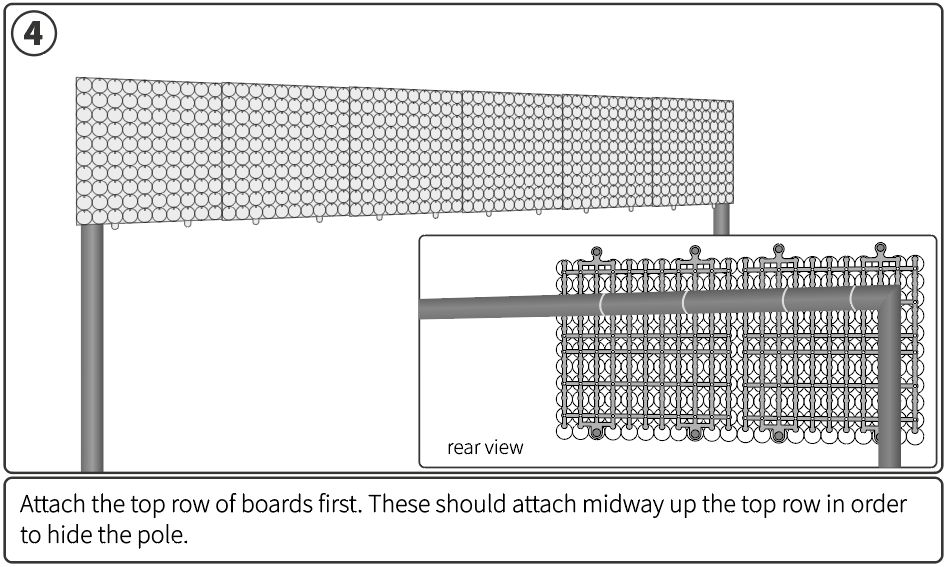
- Set up your pipe and drape stand, the most popular size is 3x3m, so we’ll be making a wall this size but you can make it however big you want! Make sure the crossbar is set to the lowest height for now, this is just to make sure you can reach the highest point to mount the ShimmerClick panels.
- Pick up two of your sequin panels and clip them together side by side. These panels are designed to have a special mechanism to make sure they are aligned straight.
- Place the ShimmerClick panels, with the top edge aligned with the crossbar, and wrap two cable ties around the panel and crossbar to hold them together.
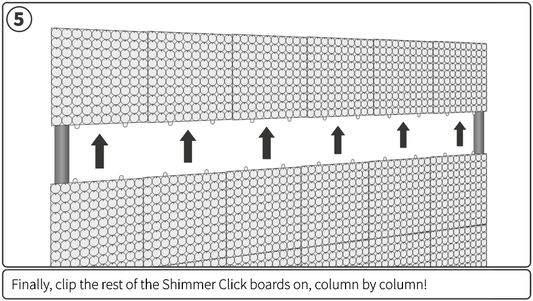
- Repeat step three until you have mounted the first top row of panels. (Make sure they are all connected side by side!)
- Next add the following rows under. You can raise the height of the crossbar to suit your needs. Use the “clicking” function to connect each panel together securely. Work your way down until you have completed the ShimmerClick wall!
Final tips and tricks
- For Option 1 or 2, make sure to use the Planogram PDF which comes with your order. If you have a special design, this sheet will help make sure you place the boards in the correct order so it’s not too much of a puzzle!
- For Option 3, make sure you place the side sequin panel columns in front of the pipe and drape stand to hide the metal work. You can also get creative and install a sea of balloons around the wall to make it even more aesthetic.
Finally remember, if you have any questions at all regarding your Shimmerwall, then please contact our team who will be happy to help; we want to make sure you are proud and satisfied with your final Shimmerwall!